1. 리스트 화면 구현
- mapper : getList.java, mapper.xml : SQL 구현
- JUnit을 통한 mapper Test
- BoardDAO : getList() 작성
- JUnit을 통한 dao Test
- BoardController : list 요청에 따른 list() 작성
- list.html : th:each - th:object - th:text 를 이용하여 루프 구현
2. Board 게시판 구현
- read.html : 글 상세보기 구현
- read.html에서 수정하기 버튼 -> modify.html
- modify 서비스에서 modify.html로 boardVO 를 전송
- list에서 검색 기능 추가
- getListWidthKey(String, String) 구현
- mapper.xml 에서 criteria(공통 부분) 작성 후 include => where 1 = 1 또는 where bno > 0
MyBatis typeAliases 사용
typeAliases : 패키지에 대한 별명 설정
src/main/java -> com.koreait.boar.mybatis -> MyBatisConfig.java
package com.koreait.board.mybatis;

import java.io.IOException;

import javax.sql.DataSource;

import org.apache.ibatis.session.SqlSessionFactory;
import org.mybatis.spring.SqlSessionFactoryBean;
import org.mybatis.spring.annotation.MapperScan;
import org.springframework.boot.context.properties.ConfigurationProperties;
import org.springframework.context.ApplicationContext;
import org.springframework.context.annotation.Bean;
import org.springframework.context.annotation.Configuration;

import com.zaxxer.hikari.HikariConfig;
import com.zaxxer.hikari.HikariDataSource;

import lombok.RequiredArgsConstructor;

@Configuration  // Config(설정) 관련 클래스
@RequiredArgsConstructor
@MapperScan("com.koreait.board.mapper")  // Mapper를 스캔할 패키지
public class MyBatisConfig {

   // 커넥션 풀 및 MyBatis에 필요한 요소들을 메모리에 할당하고 관리
   // XML과 java 연동에 필요한 경로 관리
   private final ApplicationContext applicationContext;

   // 1. Property 가져오기
   // @Bean
   // @Configuration 또는 @Component가 작성된 클래스의 메서드에 사용
   // 메서드의 리턴 객체를 Spring 컨테이너에 등록
   @Bean
   @ConfigurationProperties(prefix="spring.datasource")
   public HikariConfig hikariConfig() { return new HikariConfig(); }

   // 2. DataSource 설정
   @Bean
   public DataSource dataSource() {
      HikariDataSource hds = new HikariDataSource(hikariConfig());
      return hds;
   }

   // 3. SQL Session Factory
   @Bean
   public SqlSessionFactory sqlSessionFactory() throws IOException {

      SqlSessionFactoryBean sfb = new SqlSessionFactoryBean();
      sfb.setDataSource(dataSource());

      // SQL을 작성할 xml 경로 설정
      sfb.setMapperLocations(applicationContext.getResources("classpath*:/mapper/*.xml"));
      sfb.setConfigLocation(applicationContext.getResource("classpath:/config/config.xml"));

      try {
         SqlSessionFactory factory = sfb.getObject();
         // DB는 대소문자 구분이 없으므로 컬럼명을 _로 연결하여 만든다.
         // _로 연결된 변수를 CamelCase로 바꾸는 설정을 true로 입력
         // open_date(DB) -> openDate(Java)
         factory.getConfiguration().setMapUnderscoreToCamelCase(true);
         return factory;
      }
      catch(Exception e) { e.printStackTrace(); }

      return null;
   }

}
src/main/resources -> config 폴더 생성 -> config.xml 파일 생성
config.xml
<?xml version="1.0" encoding="UTF-8"?>
<!DOCTYPE configuration PUBLIC "-//mybatis.org//DTD Config 3.0//EN" "http://mybatis.org/dtd/mybatis-3-config.dtd">
<configuration>
	<typeAliases>
		<typeAlias alias="boardVO" type="com.koreait.board.bean.BoardVO"></typeAlias>
	</typeAliases>
</configuration>
BoardMapper.xml
com.koreait.board.bean.BoardVO 를 boardVO 로 치환
<?xml version="1.0" encoding="UTF-8"?>
<!DOCTYPE mapper PUBLIC "-//mybatis.org//DTD Mapper 3.0//EN" "http://mybatis.org/dtd/mybatis-3-mapper.dtd">
<!-- 연결할 인터페이스 정보를 namespace에 기술 -->
<mapper namespace="com.koreait.board.mapper.BoardMapper">
	<insert id="insert">
		INSERT INTO TBL_BOARD(BNO, TITLE, CONTENT, WRITER)
		VALUES(NEXTVAL(SEQ_BOARD), #{title}, #{content}, #{writer})
	</insert>
	<insert id="insertSelectKey">
		<selectKey keyProperty="bno" order="BEFORE" resultType="long">
			SELECT NEXTVAL(SEQ_BOARD) FROM DUAL
		</selectKey>
		INSERT INTO TBL_BOARD(BNO, TITLE, CONTENT, WRITER)
		VALUES(#{bno}, #{title}, #{content}, #{writer})
	</insert>
	<select id="getList" resultType="boardVO">
		<![CDATA[
		SELECT BNO, TITLE, CONTENT, WRITER, REGDATE, UPDATEDATE
		FROM TBL_BOARD
		WHERE BNO > 0
		]]>
	</select>
	<select id="get" resultType="boardVO">
		SELECT BNO, TITLE, CONTENT, WRITER, REGDATE, UPDATEDATE
		FROM TBL_BOARD
		WHERE BNO = #{bno}
	</select>

	<update id="update">
		UPDATE TBL_BOARD SET TITLE = #{title}, CONTENT = #{content}, WRITER = #{writer}
		WHERE BNO = #{bno}
	</update>
</mapper>
----
BoardController.java
package com.koreait.board.controller;

import org.springframework.beans.factory.annotation.Autowired;
import org.springframework.stereotype.Controller;
import org.springframework.ui.Model;
import org.springframework.web.bind.annotation.GetMapping;
import org.springframework.web.bind.annotation.PostMapping;
import org.springframework.web.bind.annotation.RequestMapping;

import com.koreait.board.bean.BoardVO;
import com.koreait.board.dao.BoardDAO;

import lombok.extern.slf4j.Slf4j;

@Controller
@RequestMapping("/board/*")
@Slf4j
public class BoardController {

	@Autowired
	private BoardDAO dao;

	// List
	@GetMapping("list")
	public void list(Model model) {
		log.info("---------------------------------------------");
		log.info("Get List Called");
		model.addAttribute("list", dao.getList());
		log.info("---------------------------------------------");
	}

	// register(글쓰기) 화면 호출용
	@GetMapping("register")
	public void register() {

	}

	// register(글쓰기) 처리용
	@PostMapping("register")
	public void write(BoardVO board) {
		log.info("글 : "+ board);
		log.info(dao.register(board) + "건 등록 완료");
	}
}
bootstarp -> Download
https://getbootstrap.com/docs/5.3/getting-started/download/
Download
Download Bootstrap to get the compiled CSS and JavaScript, source code, or include it with your favorite package managers like npm, RubyGems, and more.
getbootstrap.com
src/main/resource -> static 폴더에 압축 풀기

templates -> board -> list.html 생성
<!DOCTYPE html>
<html lang="en" xmlns:th="http://www.thymeleaf.org">
<head>
<meta charset="UTF-8">
<title>Board</title>
<link rel="stylesheet" href="/css/bootstrap.css">
</head>
<body>
	<h1 class="text-center" style="margin: 20px auto;">
		Board List	<input type="button" id="write" value="글쓰기"></input>
		<span class="btn btn-success" id="write2">글쓰기2</span>
	</h1>
	<hr>
	<div class="col-md-8 text-center" style="margin: 0 auto;">
	<table class="table table-striped">
		<thead>
			<tr>
				<td>번호</td>
				<td>제목</td>
				<td>작성자</td>
				<td>작성일</td>
				<td>수정일</td>
			</tr>
		</thead>
		<tbody>
		<th:block th:each="board:${list}">
			<tr th:object="${board}">
				<td th:text="*{bno}"></td>
				<td th:text="*{title}"></td>
				<td th:text="*{writer}"></td>
				<td th:text="*{regdate}"></td>
				<td th:text="*{updatedate}"></td>
			</tr>
		</th:block>
		</tbody>
	</table>
	</div>
</body>
<script>
	var btn = document.getElementById("write");
	btn.addEventListener("click", function(){
		//alert("버튼 클릭");
		location.href = "/board/register";
	});

	//var btn2 = document.getElementById("write2");
	//btn2.addEventListener("click", function(){
		//alert("버튼 클릭");
	//	location.href = "/board/register";
	//});

	var btn2 = document.querySelector("span");
	btn2.addEventListener("click", function(){
		//alert("버튼 클릭");
		location.href = "/board/register";
	});

	//querySelectorAll 일 때는 querySelectorAll("span")[0]; 이렇게 씀

</script>
</html>
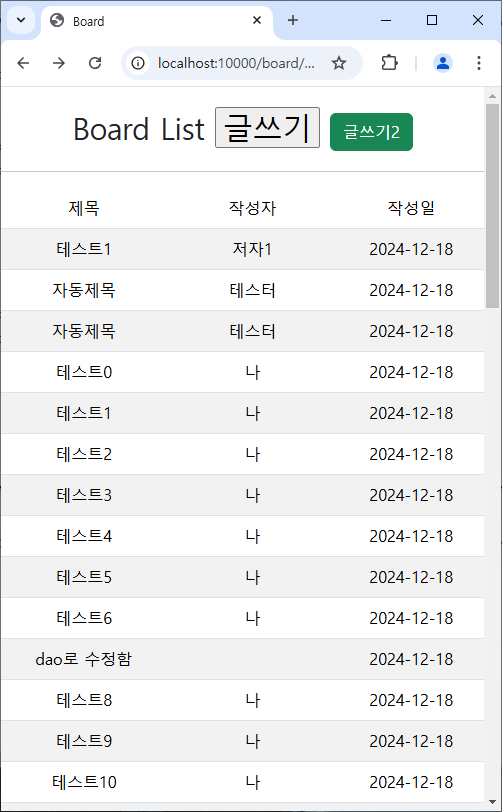
반응형 UI 만들기
width 가 918px 이하일 경우 class=hide 인 항목들 숨기기
<head>
	<meta charset="UTF-8">
	<title>Board</title>
	<link rel="stylesheet" href="/css/bootstrap.css">
	<style>
		@media (max-width: 918px){
			.hide{
				display: none;
			}
		}
	</style>
</head>
<body>
<h1 class="text-center" style="margin: 20px auto;">
Board List <input type="button" id="write" value="글쓰기"></input>
<span class="btn btn-success" id="write2">글쓰기2</span>
</h1>
<hr>
<div class="col-md-8 text-center" style="margin: 0 auto;">
<table class="table table-striped">
<thead>
<tr>
<td>번호</td>
<td>제목</td>
<td>작성자</td>
<td>작성일</td>
<td>수정일</td>
</tr>
</thead>
<tbody>
<th:block th:each="board:${list}">
<tr th:object="${board}">
<td th:text="*{bno}" class="hide"></td>
<td th:text="*{title}"></td>
<td th:text="*{writer}"></td>
<td th:text="*{regdate}"></td>
<td th:text="*{updatedate}" class="hide"></td>
</tr>
</th:block>
</tbody>
</table>
</div>
</body>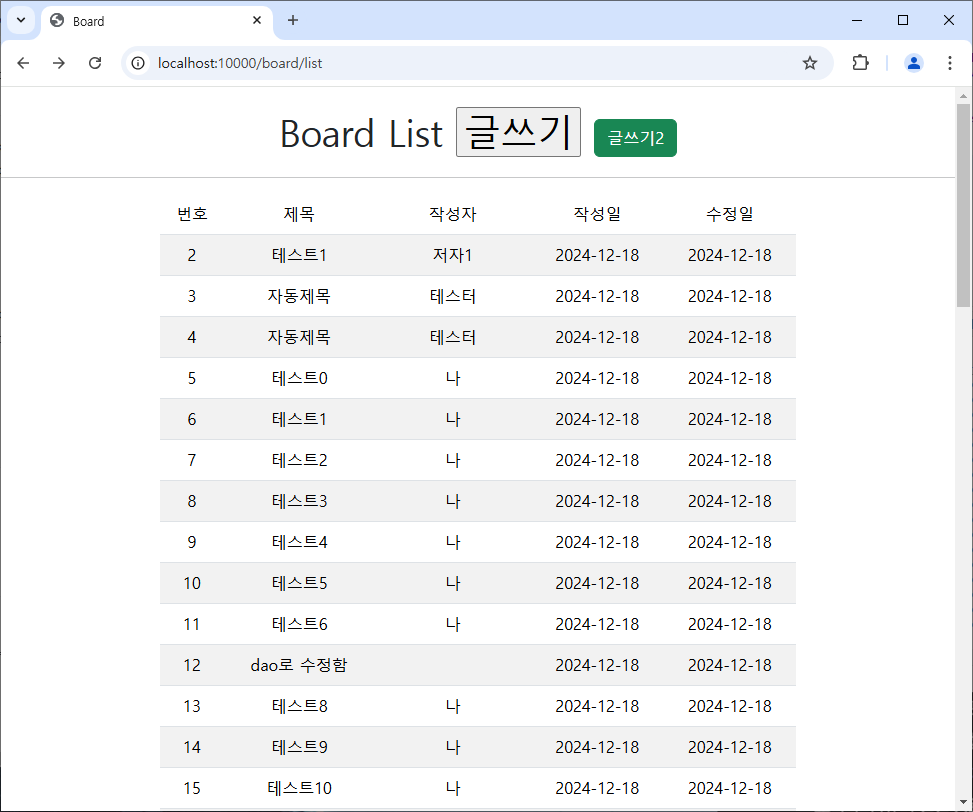
전체 소스코드
list.html
<!DOCTYPE html>
<html lang="en" xmlns:th="http://www.thymeleaf.org">
<head>
	<meta charset="UTF-8">
	<title>Board</title>
	<link rel="stylesheet" href="/css/bootstrap.css">
	<style>
		@media (max-width: 918px){
			.hide{
				display: none;
			}
		}
	</style>
</head>
<body>
	<h1 class="text-center" style="margin: 20px auto;">
		Board List	<input type="button" id="write" value="글쓰기"></input>
		<span class="btn btn-success" id="write2">글쓰기2</span>
	</h1>
	<hr>
	<div class="col-md-8 text-center" style="margin: 0 auto;">
	<table class="table table-striped">
		<thead>
			<tr>
				<td class="hide">번호</td>
				<td>제목</td>
				<td>작성자</td>
				<td>작성일</td>
				<td class="hide">수정일</td>
			</tr>
		</thead>
		<tbody>
		<th:block th:each="board:${list}">
			<tr th:object="${board}">
				<td th:text="*{bno}" class="hide"></td>
				<td th:text="*{title}"></td>
				<td th:text="*{writer}"></td>
				<td th:text="*{regdate}"></td>
				<td th:text="*{updatedate}" class="hide"></td>
			</tr>
		</th:block>
		</tbody>
	</table>
	</div>
</body>
<script>
	var btn = document.getElementById("write");
	btn.addEventListener("click", function(){
		//alert("버튼 클릭");
		location.href = "/board/register";
	});

	//var btn2 = document.getElementById("write2");
	//btn2.addEventListener("click", function(){
		//alert("버튼 클릭");
	//	location.href = "/board/register";
	//});

	var btn2 = document.querySelector("span");
	btn2.addEventListener("click", function(){
		//alert("버튼 클릭");
		location.href = "/board/register";
	});

	//querySelectorAll 일 때는 querySelectorAll("span")[0]; 이렇게 씀

</script>
</html>
'자바 공부 > [자바] 기본 공부' 카테고리의 다른 글
| [SPRING] DB 등록 (1) | 2024.12.19 |
|---|---|
| [SPRING] 게시글 추가, 리스트 불러오기 (0) | 2024.12.18 |
| [SPRING] Mapper (1) | 2024.12.12 |
| [SPRING] Lombok 라이브러리 (1) | 2024.12.11 |
| [SPRING] 스프링 프레임워크 기초 (4) | 2024.12.10 |